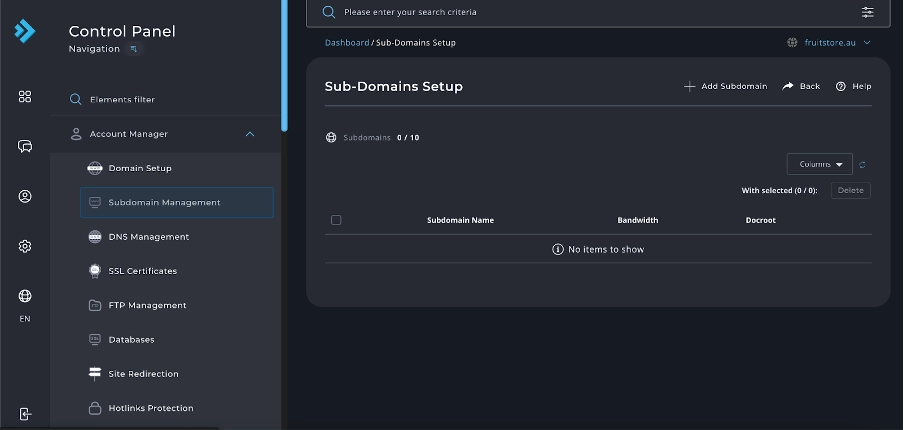
Managing Subdomains in DirectAdmin: A Step-by-Step Guide
Subdomains are a great way to organize different sections of your website. Here’s how to manage them in DirectAdmin:
Creating a Subdomain
- Log into your DirectAdmin control panel.
- In the main menu, click on “Subdomain Management” under the “Account Manager” section.

- You’ll see a form to create a new subdomain. Fill in the following:
Subdomain: Enter the prefix for your subdomain (e.g., “blog” for blog.yourdomain.com)
Document Root: You can leave this as its autofilled default option. Allows you to select where you would like the files for the site assigned to this subdomain to be stored. - Click “Add Subdomain”. Your subdomain is now set up,
Managing Existing Subdomains
- On the “Subdomain Management” page, you’ll see a list of your existing subdomains.
- For each subdomain, you have options:
Modify: Change the subdomain’s Document Root
Delete: Remove the subdomain
Deleting a Subdomain
- Tick the checkbox next tot he subdomain you want to delete
- Confirm the deletion when prompted.
Important: Deleting a subdomain will remove all associated files and databases. Make sure to backup any important data before deleting.
Tips for Managing Subdomains
- Use meaningful names for your subdomains to help organize your website.
- Regularly review your subdomains to ensure they’re all still needed and functioning correctly.
- Remember that each subdomain can have its own set of files, databases, and even SSL certificates.
If you encounter any issues or need further assistance with managing your subdomains in DirectAdmin, don’t hesitate to contact our support team.


